There’s a specific kind of dread that hits you about twenty minutes into browsing a tile showroom. You walked in feeling decisive. You leave feeling confused, mildly sunburned from the lighting, and second-guessing everything. Sound familiar?
Here’s the truth: picking the wrong floor tile, wrong finish, wrong rating, wrong room, costs real money. We’re talking cracked grout, slippery surfaces, and full tear-outs within a couple of years. So before you pull the trigger on anything, this guide is worth reading start to finish.
This breakdown covers ceramic floor tiles from every relevant angle, selection, technical specs, realistic budgeting, installation, and maintenance, so you can make a decision that actually holds up. Whether you’re renovating your forever home, flipping a property, or planning a DIY weekend project, the advice here is built around what actually matters in practice, not just what looks good on paper.
One piece of data worth anchoring this around: according to the 2024 U.S. Houzz Bathroom Trends Study, ceramic (30%) and porcelain (28%) are the most preferred shower flooring materials among renovating homeowners, confirming that tile remains the dominant renovation choice in wet-area remodeling. That preference isn’t a coincidence. It reflects decades of real-world homeowner experience with durability, moisture control, and design flexibility.
The smartest first move? Figure out whether ceramic tile flooring even belongs in your specific rooms, because mismatched placement is where most renovation regrets actually start.
Where Ceramic Tile Flooring Fits Best (and Where It Genuinely Doesn’t)
Ceramic performs beautifully in plenty of spaces. But it also gets unfairly punished when put somewhere it was never designed to handle.
Rooms That Are a Natural Fit
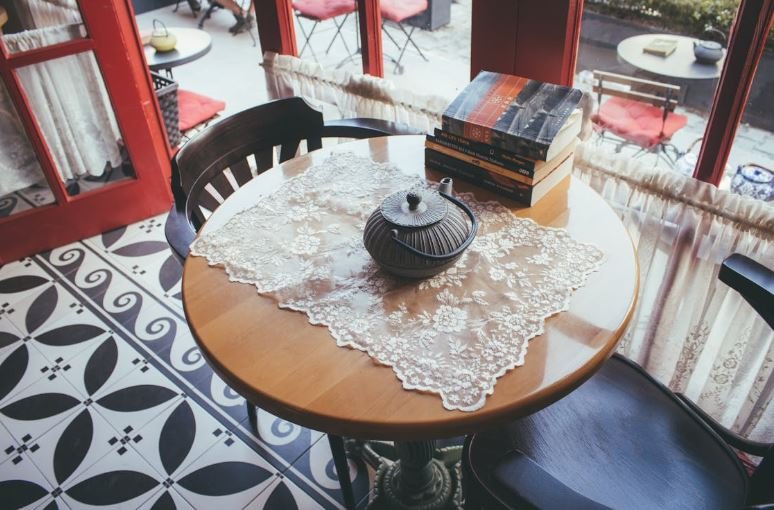
Bedrooms, home offices, dining rooms, and guest baths sit right in ceramic’s sweet spot. These are lower-to-moderate traffic environments where ceramic’s design range shines without its wear layer taking a beating.
Moisture exposure matters here too. Ceramic handles regular splashes well, bathroom vanity zones, laundry areas, powder rooms, but it genuinely struggles in spaces where standing water is a recurring reality. Add bath mats where underfoot comfort is a priority, especially on cold mornings when tile feels less forgiving.
When Another Material Outperforms Ceramic
High-traffic entryways, mudrooms, and heavy-use kitchen floors demand more than standard ceramic can reliably deliver. Porcelain’s denser body and significantly lower water absorption rate make it the smarter material for those punishment zones.
Outdoor applications and freeze-thaw environments? Not a ceramic situation, full stop. And shower floors with constant water contact are genuinely better served by small-format porcelain or mosaic options built around higher traction ratings.
What Ceramic Supports Really Well
Budget-focused renovators consistently find that ceramic floor tiles deliver a modern aesthetic without requiring a premium outlay. It plays well across multi-room style coordination projects, and it’s excellent for fast cosmetic refreshes that don’t require structural intervention.
Ceramic vs. Porcelain vs. Natural Stone: A Decision Matrix That Actually Helps
The comparison charts online are everywhere, and most of them tell you the same thing without actually helping you decide. So here’s a more direct take.
A Comparison Worth Keeping
| Factor | Ceramic | Porcelain | Natural Stone |
| Water Absorption | Moderate | Very Low | Varies |
| Durability | Good | Excellent | Varies |
| DIY Friendliness | High | Moderate | Low |
| Cost Range | $ | $$ | $$$ |
| Design Options | Very Wide | Wide | Limited |
Households with kids, pets, or rental tenants should lean toward porcelain anywhere floors see constant grit and moisture. Ceramic handles the rest reliably.
When Ceramic Is Clearly the Right Call
Ceramic makes sense when your budget needs managing, when you’re cutting tile yourself, and when you want glazed finishes across a broad spectrum of colors and patterns. It’s the ideal material for low-to-medium abuse spaces where aesthetics drive the conversation.
When You Should Seriously Consider Upgrading
Porcelain earns its higher price point when you need greater density, superior moisture resistance, or floors that bear heavier loads. Natural stone tells a compelling premium resale story, but it demands consistent sealing and maintenance most homeowners genuinely underestimate when they’re standing in the showroom falling in love with it.
Buying Checklist: Specs That Prevent Expensive Regrets
Here’s the thing about tile ratings, they feel intimidating until you realize they’re just shortcuts to avoiding buyer’s remorse. A few numbers tell you almost everything you need to know.
The Ratings That Actually Matter
PEI rating measures wear layer suitability. PEI 1 is strictly for wall applications. PEI 3 or 4 handles most residential floor traffic without issue. That’s the number to check first.
DCOF (Dynamic Coefficient of Friction) is your slip-resistance indicator for wet environments. Per ANSI A137.1, tile flooring products recommended for use in level interior spaces that will be walked upon when wet must have a DCOF of 0.42 or greater. If a tile doesn’t meet that threshold for a wet room, walk away.
Water absorption is the technical line separating ceramic from porcelain, and in saturation-prone areas, that difference matters significantly.
Glazed vs. Unglazed: Which One You Actually Want
Glazed ceramic tile flooring resists stains well and remains the default choice for most residential floors, for good reason. Unglazed tile offers natural texture and genuinely better traction, but it requires sealing and ongoing maintenance that adds up over time.
Finish selection shifts room by room. Matte and textured finishes belong in bathrooms and kitchens. High-gloss finishes photograph beautifully but feel dangerously slippery underfoot when wet. Don’t let showroom lighting fool you.
Size, Thickness, and One Detail People Miss
Large-format tiles require a dramatically flatter subfloor. Small high spots cause lippage, that annoying edge-catching problem where tiles don’t sit flush. Rectified edges allow tighter grout joints and cleaner visual lines.
Always check shade variation codes on tile boxes and order from the same production lot. A slightly different dye batch can leave your finished floor looking patchy in a way that’s impossible to fix without pulling tile.
Plan 10% overage for straight layouts, 15% for diagonal or pattern work. And store the extras, those surplus tiles become priceless the moment you need a matched replacement.
Best Ceramic Floor Tiles by Room: Performance-First Picks
What works well in a bedroom can genuinely fail in a kitchen. Room demands shift more than most homeowners expect, and the tile should follow those demands, not the other way around.
Kitchen Floors
Kitchens call for matte or lightly textured finishes that resist grease and grit without broadcasting every footprint to anyone who walks in. Drop resistance matters too, ceramic over quality underlayment handles an occasional dropped dish better than ceramic over a hollow subfloor.
Darker grout in kitchens is a practical choice, not just an aesthetic one. It conceals soil between cleanings without requiring daily attention.
Bathroom Floors
Slip resistance leads to every decision in bathroom flooring. Check DCOF ratings before anything else, then look at aesthetics. Counterintuitively, small-format tiles with more grout lines actually deliver better traction than large-format options in wet zones, more grout means more grip surface.
Keep bath mats near the tub and shower entry even with correctly rated tile. It’s an easy safety layer that costs nothing to maintain.
Entryways, Living Areas, and Basements
Entryways should run PEI 4 or higher with a texture or pattern that visually handles tracked-in soil. A good outdoor doormat plan extends how clean your interior tile stays, dramatically so, in practice.
Living spaces and bedrooms benefit from underlayment for underfoot comfort and radiant heat compatibility. Basements demand moisture testing before any ceramic installation begins. Vapor barriers and subfloor readiness aren’t optional here, they’re the foundation everything else depends on.
Layout and Style Strategies That Make Budget Tile Look Expensive
Here’s something worth knowing: layout decisions cost nothing extra, but they have an outsized impact on how high-end the final result looks.
Patterns and Grout That Punch Above Their Weight
Staggered brick, diagonal, and herringbone-adjacent patterns add visual interest without requiring a tile upgrade. Grid layouts work cleanly in modern interiors where sharp architectural lines are doing a lot of the design work anyway.
Grout color is a genuine design decision, not just a utilitarian one. Contrasting grout emphasizes tile shape and draws the pattern forward. Matching grout creates a seamless, expansive look that makes smaller rooms feel larger. Stain-resistant grout formulas in kitchens and baths are worth the small premium every single time.
Transitions, Thresholds, and the Sample Board Trick
Doorway transitions need to look deliberate. Matching trim profiles in the same tile body look cleaner than metal reducer strips, though metal works well when durability matters more than seamlessness.
Before committing to any tile, build a physical sample board. Put the tile, grout color, paint swatch, and cabinet finish together under actual room lighting. Warm versus cool light temperature changes how tile color reads in real space, and what looks perfect in the showroom can look completely different at home.
Realistic Cost Planning for a Ceramic Floor Renovation
The tile material itself is frequently the smallest line item in a full renovation budget. Planning accurately means accounting for everything else honestly.
The Costs People Underestimate
Underlayment, cement backer board, or uncoupling membranes add meaningful cost per square foot before you’ve set a single tile. Thinset, grout, sealers, and leveling systems add more. For DIY projects, tool costs, cutters, trowels, spacers, wet saw rental, can genuinely surprise first-timers in a painful way.
Labor pricing varies based on demo complexity, existing subfloor condition, and pattern selection. According to a Fall 2025 Construction Labor Market Report, 65% of builders reported some or a serious shortage of workers as of February 2024, which continues to push both installation timelines and pricing higher. Budget for this reality, not for best-case scenarios.
Where to Invest and Where You Can Trim
Subfloor prep and slip-resistant tile specs protect the long-term value of the project, don’t cut corners there. Premium grout and quality edge trim pieces create a professional finish that even budget tile can achieve when installed with care.
Subfloor Prep and Installation: The Foundation Everything Else Depends On
A flat, dry, structurally sound subfloor is the actual foundation of a successful tile installation. Not the tile. The subfloor.
Flatness, Underlayment, and Moisture Testing
Check flatness with a straightedge before purchasing anything. Most manufacturers require no more than 3/16-inch variation over a 10-foot span for standard tile, with tighter tolerances required for large-format options. A self-leveling compound is worth using whenever you’re anywhere close to that threshold.
Cement backer board suits most standard installations. Uncoupling membranes are worth the upgrade on wood subfloors or crack-prone concrete. Always test concrete slabs for moisture, addressing a failed moisture test before installation is significantly cheaper than addressing it after.
Layout Planning and Installation Quality
Begin layout from the room’s center and work outward toward walls. Dry-lay tile first to catch awkward cut sizes near doorways before mixing a single bag of thinset. Back-butter large tiles for stronger mortar coverage, and aim for at least 95% coverage to eliminate hollow spots that lead to cracking later.
Allow thinset to cure fully before grouting, typically 24 hours minimum. Plan for 48 to 72 hours before foot traffic returns, and several days before moving furniture back in.
Maintenance and Repair: Keeping Ceramic Floors Looking Sharp Long-Term
Daily grit is the primary enemy of a glazed ceramic surface. Doormats and consistent vacuuming prevent the microscopic abrasion that dulls even durable finishes over time. Use pH-neutral cleaners, avoid vinegar, bleach, or anything harsh that degrades grout through repeated exposure.
For grout, a soft brush with an enzyme-based cleaner handles deep cleaning before you reach for a steam machine. Steam can work but risks grout damage when used too frequently.
Keep surplus tiles stored flat and clearly labeled. That 10% overage you ordered? It pays off the moment a tile cracks and you need an exact match.
Furniture pads under heavy pieces and exterior doormats at every entry point are the two simplest long-term protection strategies available, and both cost almost nothing.
Frequently Asked Questions
Are ceramic floor tiles suitable for high-traffic hallways and kitchens?
Yes, when properly rated. PEI 3 or 4 handles moderate-traffic kitchens and hallways reliably. For very heavy traffic or commercial-style use, porcelain’s denser composition and higher wear resistance is the stronger long-term choice.
Which finish is safest on wet floors?
Matte and textured finishes with a DCOF rating of 0.42 or higher are the safest option in wet environments. Avoid high-gloss finishes on bathroom and kitchen floors, without exception.
How do I calculate how many tiles I need?
Measure total square footage, then add 10% for straight layouts or 15% for diagonal and pattern installations. Order from the same production lot to avoid shade variation between boxes.
Correct Ceramic Choice
Choosing the right ceramic floor tiles for a renovation isn’t about finding the most beautiful option in a showroom photograph. It’s about matching the right material to the actual demands of each room, understanding which specifications genuinely matter versus which are marketing noise, and budgeting honestly across the full scope, tile, prep, tools, and labor.
The homeowners who get this right aren’t unusually lucky. They’re simply better informed before they start shopping. Take the spec checklist seriously, prepare the subfloor properly, and the ceramic floors you install today will still be earning their place in your home decades from now.